Contacts section allows you to add and manage specific contact(s) associated with the lead, including key decision-makers, stakeholders, and representatives.
- Assign Contact(s): This function allows you to allocate specific contact(s) to a lead, enhancing communication and collaboration efficiency.
- Delink Contact(s): This feature enables you to detach specific contact(s) from a lead.
To navigate to the Lead Contacts page, follow these steps:
- Navigate to the main navigation header bar and click on Leads.
- Access the list of all clients, then click on any client to be directed to the Lead Summary page.
- Select Contact(s) and then click Assign Contact.
To add a lead contact, simply click on the (+) button, input the details, and then click Save. To remove contact(s) from the lead, choose the checkbox next to each contact and then click on Delink Contacts.
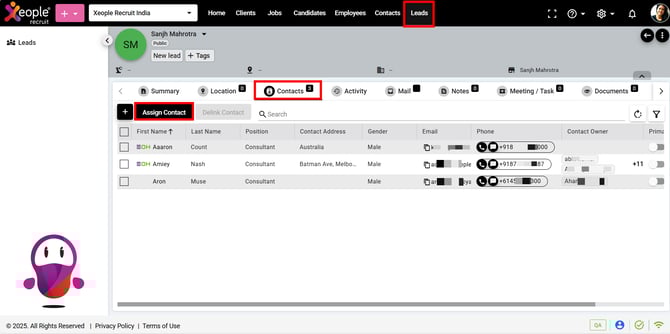
Lead Summary Page - Contacts - Assign Contact
- Upon selecting Assign Contacts, you will be presented with a list of all contacts add under the Contacts Module. Choose the desired contacts using the checkboxes provided, then click Assign Contact to proceed.
Optional Reading: How to add a contact, click here: Create a Contact. Contacts create here will be reflected when clicking Assign Contact.
You can use the search box to filter out the required contact(s).

Assign Contacts
Upon assigning contact(s) you can make the contacts as the Primary Contact.
Primary Contact within a lead act as the key communication point, managing interactions and addressing any needs or concerns throughout the lead engagement process. To designate a contact as the Primary Contact, toggle the Primary Contact option under the Contacts section upon assigning contact(s).
You can designate only one contact as the Primary Contact for the specific lead.
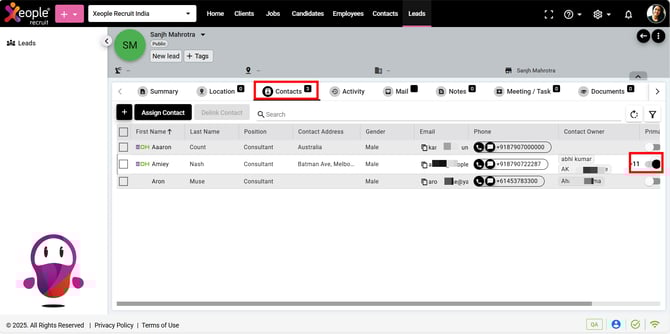
Assign Contact(s) - Primary Contact