Organising folders enables you to map employee to specific folder(s) by creating folders directly from the employee landing page. This helps streamline and manage employee documents within a designated location, enhancing accessibility and improving overall efficiency in locating and managing files.
To add folders from the Employee Landing page, follow these steps:
- Navigate to the main navigation header bar and click on Employees.
-
Click on Folders on the top right of your screen.

Employee Landing Page - Three-dot - Folders
-
Click on the Add button, then enter the folder name and description.
- Click Save.

Add - Add Folder - Save
-
Your created folder will appear under the Add Folder list.
- To edit or delete the added folder, simply click on the three-dot button placed in front of each folder and choose either Edit or Delete as per your needs.

Folder Added - Edit or Delete
- Now, from the employee summary page, upon reviewing a employee's detail, you can map the employee to specific folder(s).
- To do so, scroll to the bottom and check the Folders section. Click on (+) to map employee to folder(s).
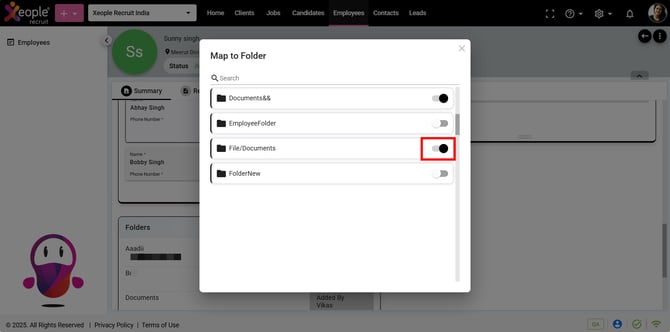
Employee Summary Page - Folders - Map to Folder
- Similarly, you will find the Add to Folder option under the three-dot button.

Employee Summary Page - Add to Folder
- Likewise, you have the option to map an employee to one or multiple folder(s). To remove a mapped folder, click on the (+) button and then toggle off the selection.