Create a view for your calendar to control which source data appears on screen. Since each view is linked to a specific source, only the data associated with the selected view is displayed.
To create a calendar view, follow these steps:
- Click Master Data, Views under Roasters.
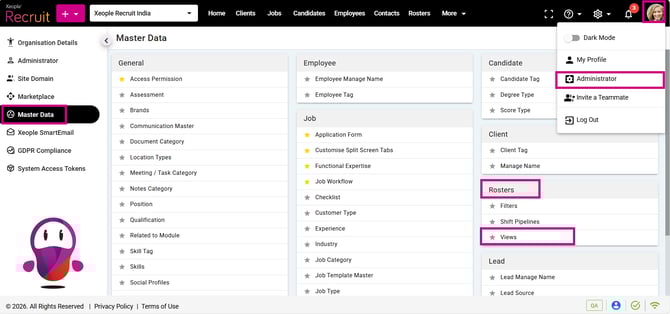
Profile Picture – Administrator – Master Data – Rosters - View
- Click on (+) add button to add a view. Enter the information in the respective fields.
- Click Save.
Each field represents:
|
Field |
Type / Behaviour |
Mandatory |
Default / Notes |
|
Name |
Text |
Yes |
Cannot be blank |
|
Status |
Single-select (Active / Inactive) |
Yes |
Default: Active |
|
Description |
Long-text |
No |
Optional |
|
Source |
Single-select |
Yes |
No default |
Conditional Fields (shown after selecting Source)
|
Field |
Type / Behaviour |
Mandatory |
Default / Notes |
|
View Type |
Single-select |
Yes |
No default; Options: source-specific view types like Shift. |
|
Filter |
Single-select |
Yes |
No default; sourced from Masters > Rosters > Filters; includes (+) New to create a filter. |
We recommend creating a filter before creating a view, as the filter dropdown appears during the view setup.
Additional Options (Accordion – collapsed by default)
|
Field |
Type |
Mandatory |
Default / Notes |
|
Default Period |
Single-select |
No |
Default: Week |
|
Default Mode |
Single-select |
No |
Default: Block |
|
Default Grouping |
Single-select |
No |
Default: Service Location |
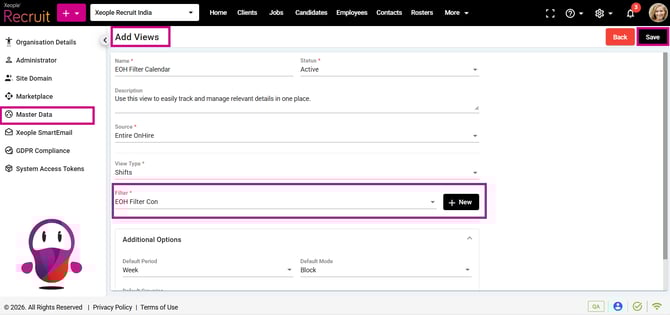
Master Data – Add View
- Once saved it will appear on the view landing page.
Add New View – Save
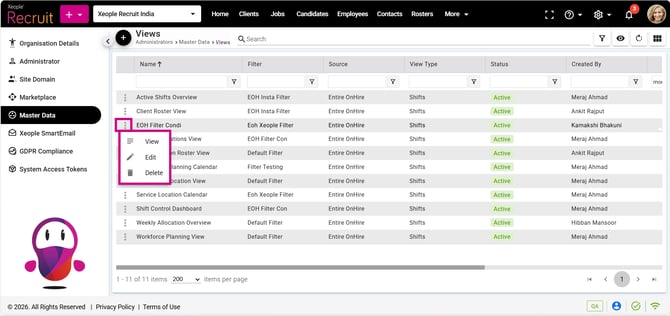
View Landing Page
This screen shows all View(s) you created or those configured by the admin, based on your permissions. You can edit or delete only the Views you created. Super Admin and Admin can edit or delete any user-created View(s), depending on access. By default, admin-created Views appear if no other Views exist.
Actions to perform on the View landing page:
- Add a View (+).
- Search: Allows you to swiftly locate specific view(s) by entering keywords or search terms, facilitating efficient retrieval of the relevant view.
- Filters: You can use advanced filters to quickly sort and refine the displayed view listings based on various criteria.
- Audit Log: Opens the audit log page, filtered to display only View-related audit trails.
- Refresh Button: Allows you to refresh the page and update the view listings in real-time.
- Grid View: Presents view details in a card-style format, offering you a quick and intuitive way to scan through essential information.
Options available under the three-dot against each view in the masters:
- View: Opens view details in a read-only mode displaying all View fields as per your access permissions.
- Update/Edit View: Launches the view in edit mode, allowing modifications to fields (except Source), re-validates inputs on change, and saves updates to the View with an Audit Log entry of type Update/Edit.
- Delete View: Opens a confirmation prompting deletion of the selected View; on confirmation, deletes the View and records a Delete entry in the Audit Log as per your access permissions.
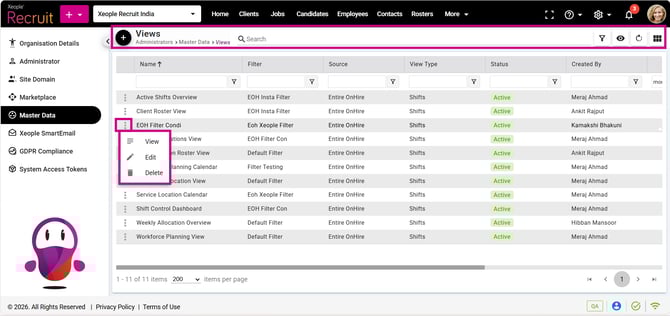
View Landing Page – Actions
How a calendar view appears:
Once you configure the required View(s) in View Master, they automatically appear as selectable tabs in the Calendar Header. From here, you can quickly switch between different views to control which source data is displayed on the calendar. This functionality ensures that schedulers can tailor the calendar display to specific operational needs.
While creating a View, you have the option to configure permissions for both the View and its associated Filter (from Master Data – Create Filter). The filter is selected during the view creation process.
- If a View is set to Public and the linked Filter is configured as Protected, the View permissions override the filter permissions.
- Conversely, if the Filter is Public, users will still only see the data permitted by the Protected View settings.
- This ensures that the calendar display always adheres to the access rules defined at the View level, even when the filter applies more restrictive controls.
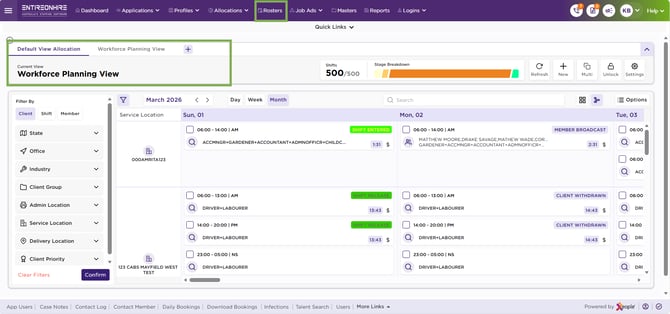
Calendar - View