Optional Reading: How to Create an Employee, click here: Create Employee.
To navigate to the Invite Users page, follow these steps:
- Navigate to the main header bar, click on the Settings drop-down menu, and select User Management.
- Click the (+) button on the top left-hand side to Invite User.
Settings - User Management - Invite User
- Enter the details and click Invite User.
Recommend Reading: How Application Roles and Authorisation works, click here: Application Roles and Authorisation.
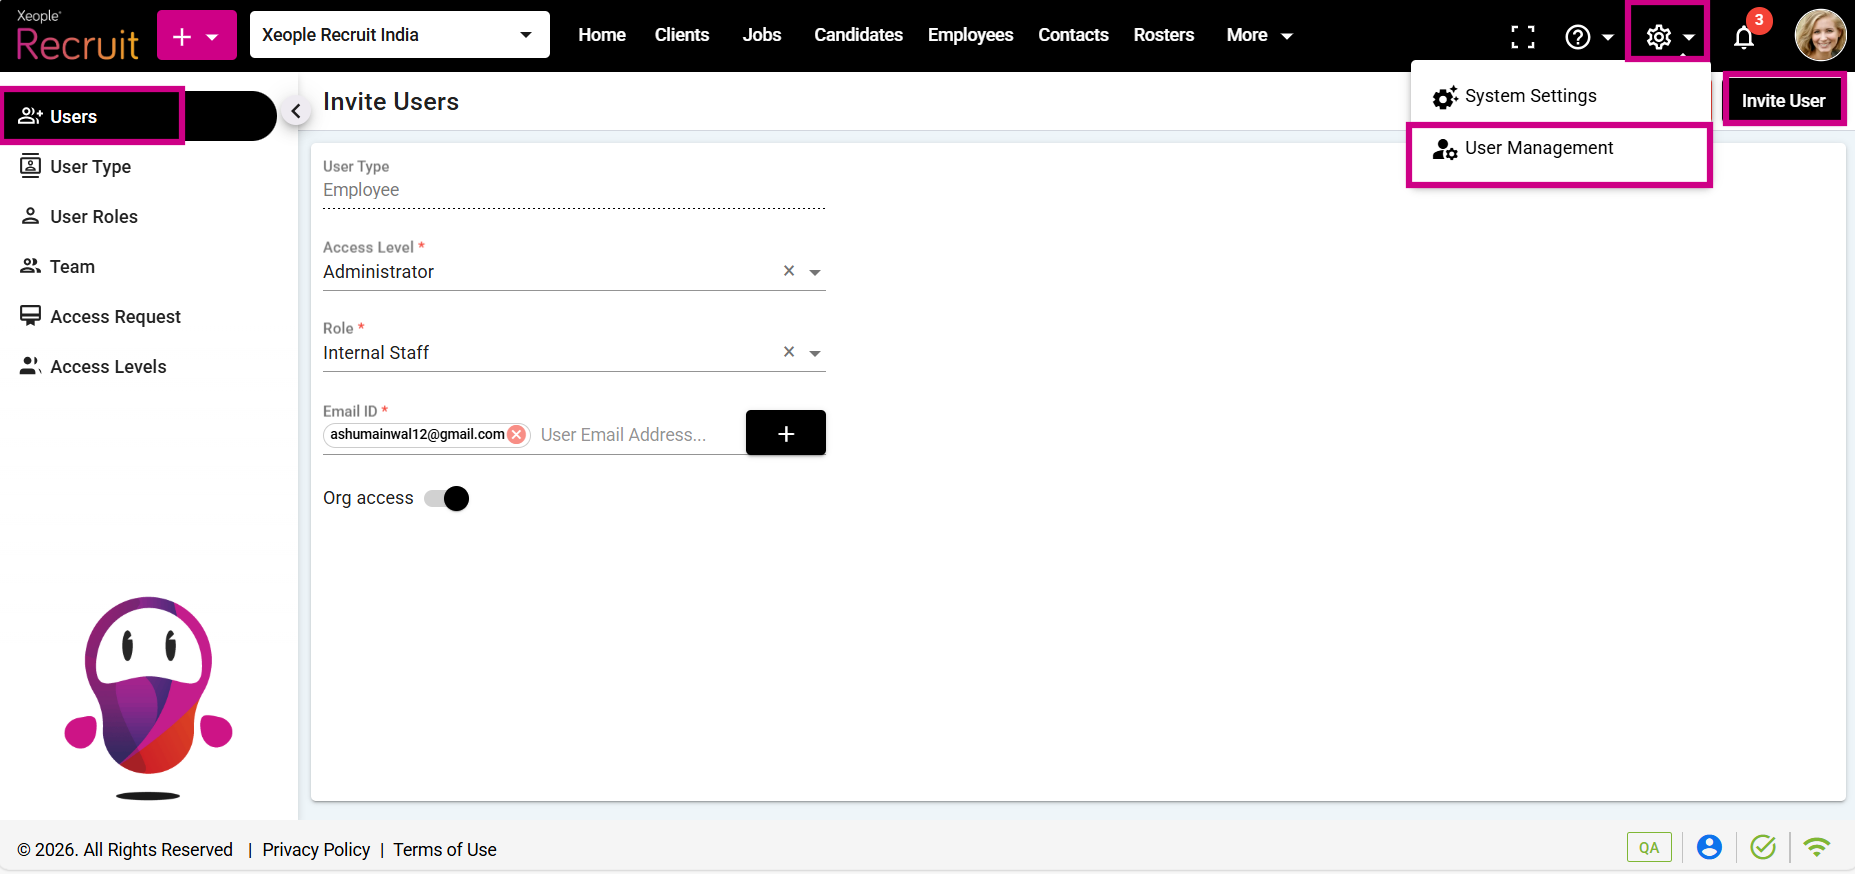
Enter Details - Invite User
After inviting a user, the user will get an invitation. Users can then log in using the link given in the invite email.
Once an employee leaves the organisation, don't forget to turn off their site access, as you cannot delete an employee from the system for security and data breach prevention reasons.
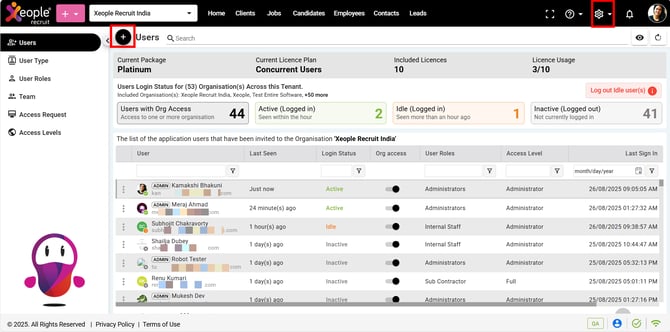
- Once a user logs into the system, their last sign-in activity will be recorded, indicating that they are using the application.
- If no last sign-in activity is logged, you can Re-invite the user via the three-dot button. This feature is accessible only to admins and super admins.
- To edit or view a user click on Edit or the View options as needed.
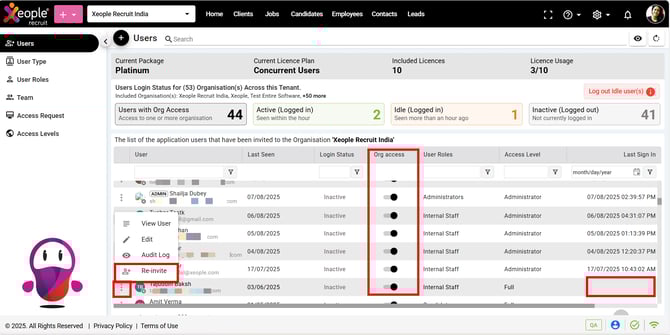
Re-invite User
Inviting a User:
- This involves giving someone access to the system, allowing them to log in and perform specific functions based on their assigned roles and permissions. It’s more about granting access to system features rather than just adding them as part of the organisation.
Inviting a Teammate:
- This usually refers to adding someone as a member of the organisation within the system. The employee's basic information is entered into the system, but they may not necessarily have access to the platform or specific applications until further permissions are granted.
- Similarly, to invite a teammate, click on the profile picture and select Invite a Teammate.
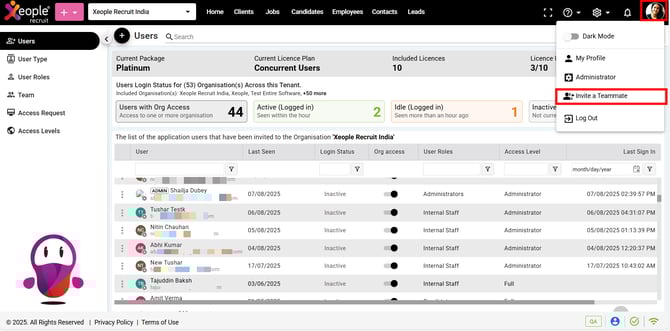
Profile Picture - Invite a Teammate
- Simply add the employee's email ID, which will then appear in the Admin or Super Admin's Access Request tab. The Admin or Super Admin will review the request and either grant or deny access to the employee.
Recommend Reading: How User Access Request works, click here: User Access Requests.