Customise Split Screen Tabs enables you to configure the tabs inside the Job Action window for each Stage Type in a Stage.
The Stage Type field is now mandatory, and you can define only one stage type per workflow stage in the Job Workflow Master. For instance, if the screening stage type is mapped to the screening workflow stage, it cannot be mapped to any other workflow stage.
If a desired stage type is not available in the list, you can map the Others stage type to a parent workflow stage, allowing multiple mappings. However, the remaining stage types can only be mapped once to a single parent workflow stage.
You can configure the Job Workflow Stage as per your needs from the Job Workflow masters, but the Stage Type is not customisable as it is hardcoded and cannot be altered.
Optional Reading: How to map a stage type to a stage or details on a Job Workflow, click here: Setup a New Job Workflow Hiring Process, Understanding Job Workflow and its stages.
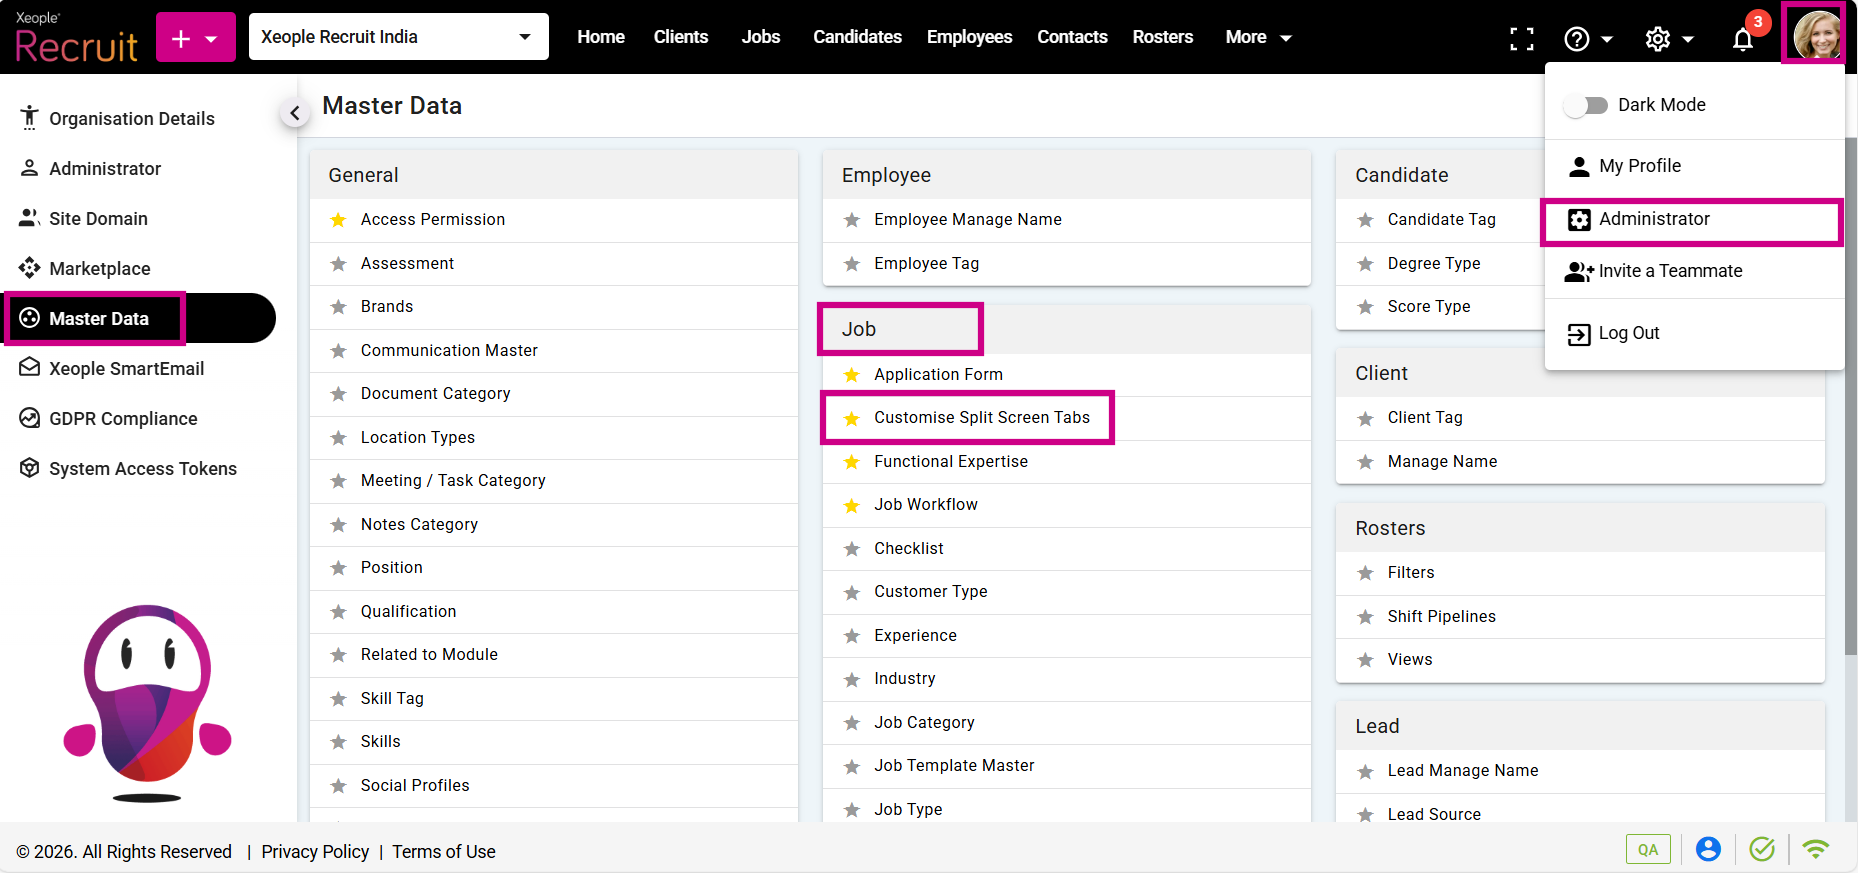
To navigate to the Customise Split Screen Tabs Master, follow these steps:
- Click on the Profile picture and select Administrator from the drop-down menu.
- Click on Master Data from the left navigation panel.
- Select Customise Split Screen Tabs under the Job Masters.
Administrator - Master Data - Customise Split Screen Tabs
- You will see two tabs Job Action.
- Under the Job Action tab, use the six-dot icon to reorder the tabs this is a drag-and-drop feature. The sequence set in the Customise Split Screen Tabs Master will reflect in the job action window, maintaining consistency across all stages.
- Click on the Edit (Pencil) button to rename the job action tabs as needed, this has a maximum character limit of 20.
An error message will display if the limit is exceeded: Maximum character limit is 20.
- Click on the Show/Hide toggle to show or hide job actions as required.
By default, the toggle is enabled, meaning the job action appears in the job action window for all selected stages. If disabled, the job action will not appear, but mapping data will be retained.
- Map Job Workflow Stage to Allow Job Actions:
- Default Mapping: Certain stages are pre-mapped to each job action: Applied, Shortlisted, Screening, Interview, Offered, and Hired. You can add more by clicking on the tile. Similarly, to disable it unclick it.
The Job Action tab(s) will be reflected for each stage in the job workflow if ticked. Unticked actions won't appear. For example, if the Interview tab is set as the 3rd tab and renamed as Meetings, and it's in Show mode with the stage mapped to the Applied, Interview, and Screening stages, then the Interview tab will appear as Meetings in the 3rd position in these stages.
The Notes tab will always be displayed by default on all stages. Other tabs are configurable, except for Notes. Therefore, in the master, the show/hide column and the map job workflow stage column will be disabled for editing. You can only rename the Notes tab as per your requirement.
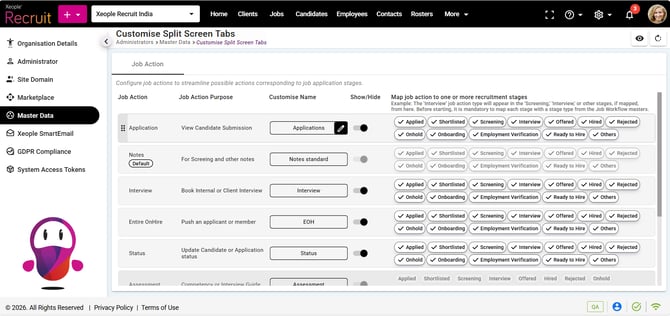
Customise Split Screen Tabs - Configure Job Actions
Impact on Job Action Window after Configuring Customise Split Screen Tabs Masters
All changes mentioned here are controlled via the Customise Split Screen Tabs Master and apply across all the Job Workflow Stage mapped with a Stage Type.
-
Sequence: The sequence set in the Customise Split Screen Tabs Master will reflect in the Job Action window for all stages. For example, if the sequence is Notes first, Application second, and Interview third, you will see the tabs in this order across all stages, except for stages with no stage type mapped.
-
Information entered and saved in any tab remains intact even if the tab is temporarily hidden. Once re-enabled, the saved data reappears without loss.
-
Changes made in the Customise Split Screen Tabs Master affect only the workflow stages mapped in this configuration. Tabs appear based on mapping settings, ensuring consistency and clarity.
-
Status Tab Handling:
-
If you are in the Status tab set as visible and change the candidate's status to the next or previous stage, the screen refreshes.
-
If the next stage does not have the status tab, it will be removed from the refreshed screen, showing only relevant tabs for that stage.
-
By default, you will land on the Notes tab.
-
If the Status tab is in Show mode for the next stage, the user will remain in the status tab after the screen refresh.
-
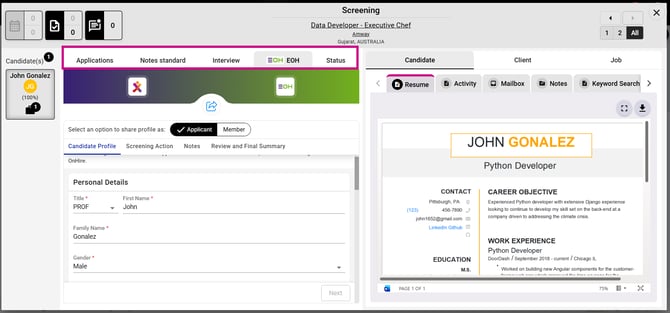
Job Summary - Candidate - Action - Job Action Window
Recommend Reading: How Job Action window works, click here: Job Action.