Candidate Tag allows you to categorise and label candidates based on specific criteria or characteristics. These tags help organise and manage candidate data effectively, making it easier for you to track, search, and retrieve candidate information as needed.
Configuring candidate tags offers several benefits:
-
Tags allow you to segment candidates into different groups, enabling better organisation and more targeted communication.
-
Candidate tags can be customised to match the unique needs of the recruitment process, providing flexibility and adaptability.
-
Tags enable you to categorise candidates based on specific skills, qualifications, or preferences, helping to identify the best fit for job roles more efficiently.
To configure the candidate tag(s), follow these steps:
- Click on the Profile picture and select Administrator from the drop-down menu.
- Click on Master Data from the left navigation panel and select Tag under Candidate.
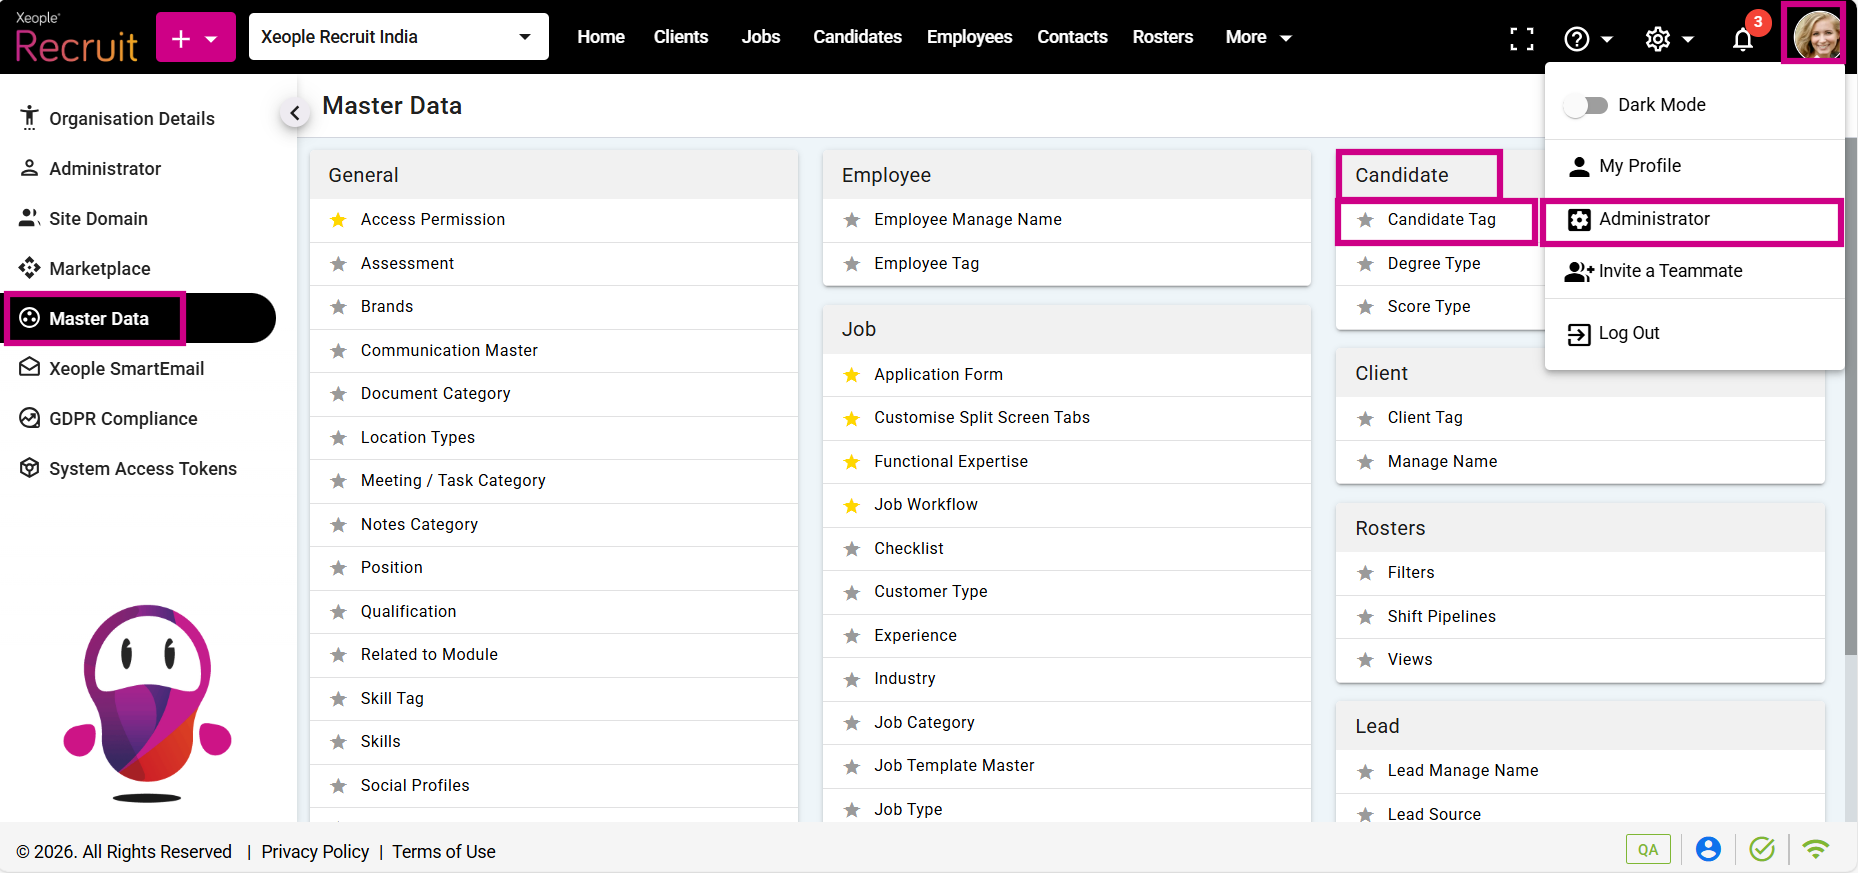
Administrator – Master Data – Candidate - Tag
- Click on (+) to add a candidate tag.
- Enter the details and click Save.

Add Candidate Tag - Enter Details
- The created Candidate Tag will appear in the list.
-
Click on the three-dot button next to each candidate tag to View, Edit, or Delete a candidate tag.

Candidate Tag - Created
To assign a candidate to a specific tag, navigate to the candidate summary page where you'll find the tags you've created from the candidate master. Additionally, on the candidate landing page, use the filters to quickly check and sort candidates based on their tags.
Check out these articles to read more on Tags and Filters: Profile Details, Candidate Landing.
- Priority from EOH syncs to XR on extraction, appears as a chip with tooltip under tag in Candidate summary.