
A recruitment funnel in a dashboard offers a comprehensive visual overview of the entire recruitment process, highlighting key indicators and metrics. It encompasses all critical metrics for each job in the workflow and the associated candidates, providing a detailed insight into recruiter performance.
To navigate to the recruitment funnel, follow these steps:
- Click on Home from the main header and select Dashboard.
Information: If the dashboard is not yet configured, you will only see the Configure Dashboard option; after configuration, the Launch Dashboard option will become available.
- Click Launch Dashboard. This will navigate you to the Recruitment Funnel.
Information: The default view depends on the user's menu access. If a user lacks access to the Recruitment Funnel but has access to My Dashboard, then My Dashboard will be the default view.
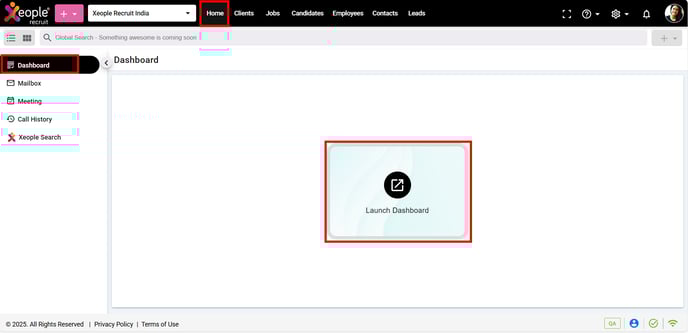
Dashboard - Launch Dashboard
Note: You can easily switch between the My Dashboard and Recruitment Funnel tabs by clicking on them as needed.
Note: On the top of the Recruitment Funnel you will see a static menu which will be common for the tabs like My dashboard and Recruitment Funnel, which shows the Organisations logo, Organisations selection, Select Dashboard, Set dashboard as default (will set the selected dashboard as your default one), Date Period, Team(s), User(s), Settings, Refresh, Profile Picture (Enable Dark Mode & Logout) and the Menu (My Dashboard & Recruitment Funnel).
The functioning of each global/static filter is as follows:
Information: This filter is static across all top panel menus, and the dashboards will display data based on the selected values.
- Logo will appear based on the logged-in tenant's logo.
- To select an organisation, click on the organisation field drop-down.
Note: The organisation selection feature allows you to change the access and data displayed on the dashboard based on the chosen organisation. By default, the dashboard will show the organisation based on where the dashboard is launched from. Once the user selects a different organisation, this preference will be saved and displayed by default from the next visits.
Only organisations specific to the user accessing the dashboard will be available for selection. If a user belongs to only one organisation, that organisation will be automatically selected as the default.
Note: The static filters are hidden by default. Click on Global Filter to expand the section.
- Click on the Dashboard drop-down to select a dashboard.
Note: Dashboard is a mandatory single-select drop-down where users can choose the dashboard they want to view based on their settings.
Information: Admin users can view all dashboards they’ve configured for users, except those created by non-admin users. Non-admin users can view dashboards configured for them by the admin, as well as those they’ve created or cloned.
Information: Once a dashboard is selected, the view will adjust to the user's (either admin or non-admin) settings. By default, the first alphabetically assigned will be selected, and any changes will be saved for future visits.
- Click on the Set as Default next to the dashboard selection to set this as your default dashboard that will be loaded every time you land on this screen.
Note: If a user has access to only one dashboard, it will automatically be set as the default, and the Set as Default option will be disabled. For multiple dashboards, the first added dashboard becomes the default. To switch, uncheck the current default and enable Set as Default for another.
- Click on the Date Period drop-down to apply a date filter.
Note: The Date Period filter is a single-select dropdown with options such as Last 7 Days, Current Week, and others, displayed in this sequence. The default selection is Last 30 Days.
-
- Current Week: Displays data for the current week. For example, if today is March 19th, it will show data from March 18th (Monday) to March 24th (Sunday).
-
- The Last Week filter retrieves data for the previous week. For example, if the current week is Week 11 (March 18–24), this filter will display data for Week 10 (March 11–17).
- The Current Fortnight filter shows data based on the standard fortnight periods: the 1st–15th or the 16th–end of the month. For instance, if today is March 21, selecting this option will display data for March 16–31.
- The Last 7 Days (01/07/2024-07/07/2024) filter shows data for the past seven days, including the current date.
- The Last 14 Days filter covers data from the last 14 days, calculated from the current date.
- Current Month: Displays data for the current month (e.g., March 1 to March 31).
- Last 30 Days: Displays data for the past 30 days from the current date.
-
- Current Year: Shows data for the entire current year (e.g., January to December 2024).
-
- Last Year: Shows data for the previous year (e.g., if the current year is 2024, it will display data for 2023).
-
- Current Financial Year: Reflects data for the current financial year (e.g., 1 July 2023 - 30 June 2024).
-
- The Custom filter allows users to define a specific date range using From and To fields. For example, selecting March 12, 2024, to April 12, 2024, will display data for that exact period.
- Click on the Team(s) drop-down to view data of a specific team.
Note: Team(s) is an optional multi-select drop-down with no default selection. When a team is selected, the User(s) filter defaults to All for that team, displaying the users in the drop-down. Without a team selected, admin users will see all users in the User(s) field, while non-admin users will only see their own name in a disabled mode. Admins can access multiple teams, while non-admins can only access teams assigned by the admin. Data is grouped by the selected team.
Information: To read more on how to add a Team, click here: Add a Team.
Information: To read more on User Role and Access levels, click here: User Role and Access levels.
- Click on the User(s) drop-down to select a specific user a part form you.
Note: User(s) is a mandatory multi-select drop-down field. For admin users, it displays all employees invited to the application, with the logged-in user auto-selected by default. For non-admin users, the logged-in user is auto-selected, and the filter is disabled. If a manager views the dashboard with their name selected in the User(s) field and then chooses a team, the field will include both the manager and team members, each represented as a chip. The manager can remove their name from the list. The User(s) field will always contain selected values.
- Click on the Settings button to either configure the Dashboard or to view, edit, clone or delete the ones you created.
- Click on the Profile picture to turn on the Dark Mode option to switch between light and dark themes for a comfortable viewing experience.
- Click the Logout button to securely exit your account.
- Click the Refresh button to update data for all applied filters.
Note: Except for the top menu (static filters) all other elements on the screen can be scrolled.
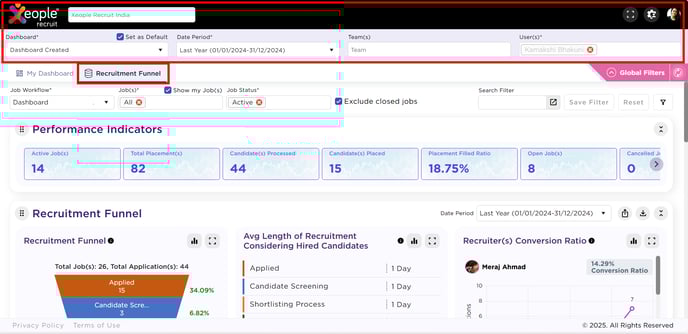
Dashboard – Recruitment Funnel – Static Filter
Note: For details on Job-related filters, click here: Job Related Filters. This article is continuation on how the Job-related filter works.