Jobs Status Master consolidates and organises information pertaining to the status of diverse job positions, offering a comprehensive overview of their current state within an organisation.
Some Benefits of Configuring the Job Status Master:
- Ensures uniformity in defining and tracking job statuses across the entire recruitment process.
- Provides a clear and standardised understanding of where each job stands in its lifecycle, promoting transparency among team members.
- Streamlines workflow by allowing quick identification of the current status of each job, reducing the time needed for updates or decision-making.
- Enhances reporting capabilities by enabling accurate analysis of job progress, bottlenecks, and overall efficiency in the recruitment pipeline.
- Offers flexibility in tailoring job statuses to align with specific recruitment workflows or industry requirements, providing a customisable solution.
To configure Jobs Status Master, proceed by following the steps outlined below:
- Click on the Profile picture and select Administrator from the drop-down menu.
- Click on Master Data from the left navigation panel.
- Under the General Master Data, select Status.
- Now, you will see Groups, click on Job three-dot button and select View from the drop-down.
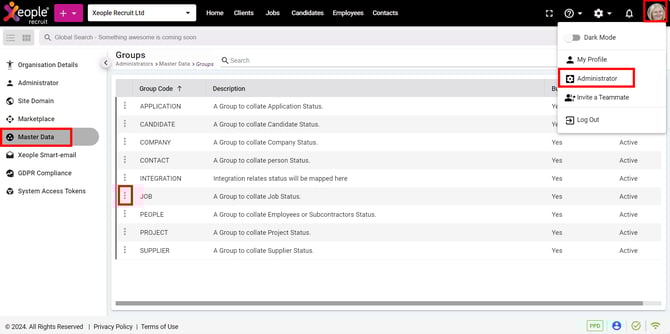
Administrator – Master Data – Status – Groups – Job
- Click the (+) button to add new status.
- Enter the details and click Save.
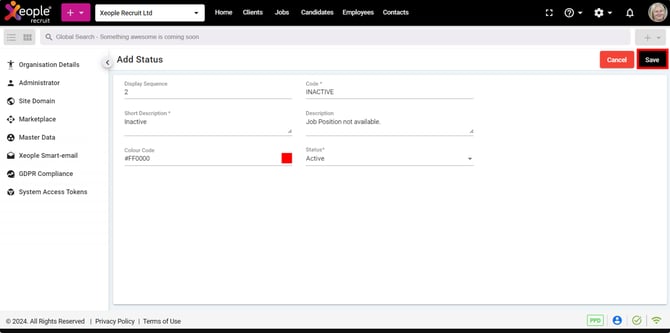
Master Data – Status – Groups – Add Status – Save
Job status you create here will be displayed during the job creation process. This status indicates whether the job is active, inactive, or closed, determining if candidates can apply for the position or not.
- To set up the Reason for each status, click on the three-dot button next to each status, then select View.

Status - Configure Reason
- On the Reason screen, click on the (+) button to configure the Reason.
- Similarly, click on the three-dot button to Edit or Delete a reason.

Status - Reason - Add
- Enter the Reason Description and Status accordingly and click Save.
Once the reason is configured, it will appear in the Reason drop-down menu for each status.
- If you wish to view, modify or remove the added status, click the three-dot button and select View or Edit, or Delete from the drop-down menu, as required.
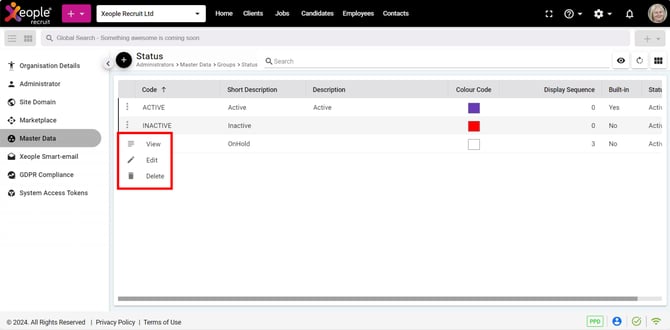
Master Data – Status – View, Edit or Delete