Client Tag refers to a feature in client management systems that allows you to categorise clients based on specific criteria or characteristics. This feature is essential for organising and managing client data effectively.
Configuring client tags offers several benefits:
- Client tags facilitate streamlined workflows by allowing you to quickly identify and group clients according to their attributes, making it easier to manage and prioritise client interactions.
- With client tags in place, you can easily search for and retrieve clients based on their assigned tags, reducing the time and effort required to locate specific client records.
- Client tags offer customisation options, allowing you to define your own tagging criteria based on your unique business needs. This flexibility ensures that client tagging aligns closely with organisational goals and objectives.
To configure the client tag(s), follow these steps:
- Click on the Profile picture and select Administrator from the drop-down menu.
- Click on Master Data from the left navigation panel and select Tag under Client.
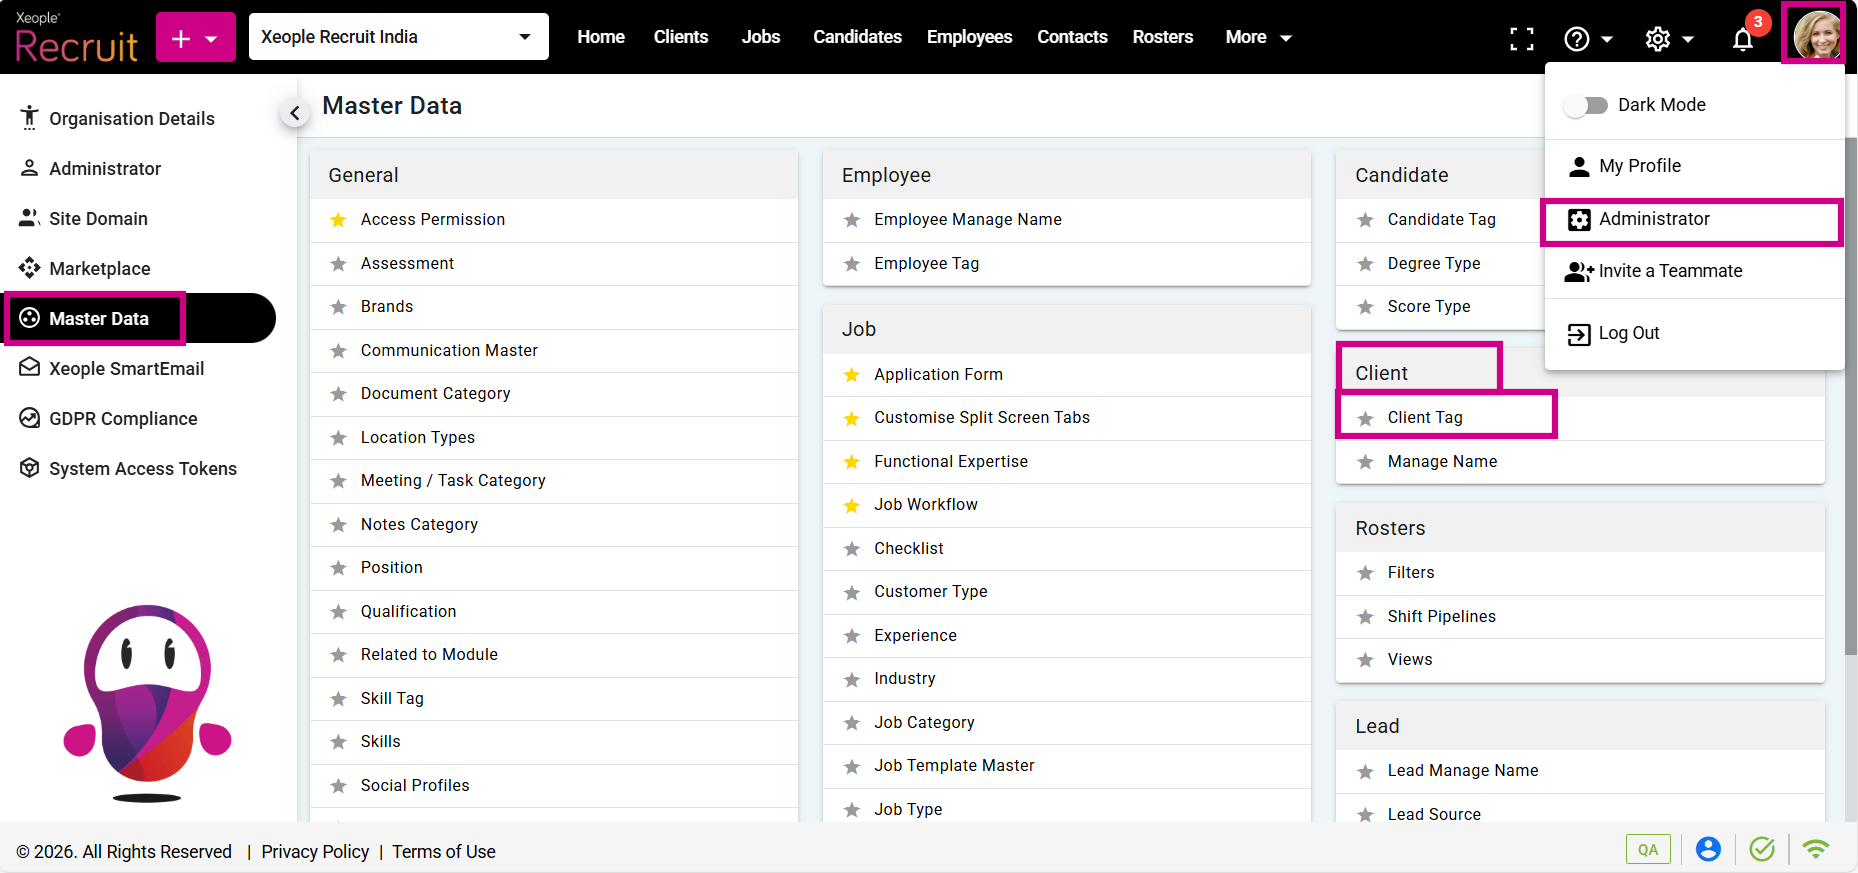
Administrator – Master Data – Client - Tag
- Click on (+) to add a client tag.
- Enter the details and click Save.

Add Client Tag - Enter Details
- The created Client Tag will appear in the list.
- Click on the three-dot button next to each client tag to View, Edit, or Delete a client tag.

Client Tag - Created
To assign a client to a specific tag, navigate to the client summary page where you'll find the tags you've created from the client master. Additionally, on the client landing page, use the filters to quickly check and sort clients based on their tags.
Check out these articles to read more on Tags and Filters: Client Summary, Client Landing.